Creating: Outside the Clique

Knitting, crocheting, felting, weaving, spinning, dyeing or embroidery, most of the things we make as creators are done alone, apart or outside of group environments. The reasons why are as many as the people who have said reasons and all are valid even if they seem superficial or completely bogus. Some people might live in remote areas and find it difficult to travel, other are busy with work or family commitments and can’t get away because of time restraints, or maybe restricted due to an internal feeling that social interactions are too much work for the rewards received from participation. Time, health, commitments and finances are huge factors and lets face it, who hasn’t thought about their upcoming craft meeting and thought to themselves “It’s to much energy, I’ll just stay home.” After wrangling all these elements and making it to the meeting, sitting down and getting the creative process going is a blessed moment, you wouldn’t it want stolen from you by say, ‘bullying tactics’ targeted at you from a fellow creator.

One of the main reasons I tend to avoid group crafting comes from the volatile nature of social dynamics and the universal truth, once you let other people into your environment you are giving up control of that space to others. It’s also true that just because those people your sharing creative space with are also makers, that doesn’t guarantee it’s going to remain a safe space for you to be in. Nasty people like to make things too, even Adolf Hitler had hobbies, and the bullies we hide from in life can also be hiding from us, right up until that moment the crosshairs land on you. And while one random bully can do a fair bit of damage in a group, a “Clique” is always devastating and almost impossible to eradicate.

“Clique”. noun. ˈklēk ˈklik. : a small group of people who spend time together and are not friendly to other people. A clique is usually a smaller group of people within a larger one, that are mostly composed of one type of person or personality type. The goal of a clique is to perpetuate enforced exile on group members outside the inner group. A type of bullying by social neglect and exclusion.

Social exclusion is as old as human history and as harmful to us as a mortal wound or disease, traditionally exile has meant death to those who are emburdened with it. In the modern world social out casting and isolation will still reduce the lifespan of our societies vulnerable, but how does this relate to it’s creatives? We should first ask Why Do We Create? If you where to ask 100 makers why they make things, you would likely get an audible riff on “Self Expression”, but fundamentally it’s more than that. When we create, we are making ourselves more, more than what we are now. When we create, we are growing, making ourselves more today, than we where yesterday. And although there are other ways to do this, creating/making is an empowering process, I Have Made This And No-one Can Take That Away From Me – that is Powerful. In a world where power is taken from us, by our Govenments, by our Bosses, by our Social Systems, Creating is a way for us to take back some power over ourselves.

This is where the social Clique can become devastating, because life can be relentlessly cruel on the fringes. We know our Governments are going to screw us, we know our bosses job is to screw us, we expect our systems to fail us when we need it the most, but what we don’t expect is to be blindsided by our peers who are as desperate for empowerment as we are. What the ‘Crafting Clique’ does to people is to exclude them from participation, information, inspiration and encouragement, and lets not forget, Sharing. When people become a wall to you, it can shake you to your very core. So when moments that should be empowering, become moments of self doubt, how should we react?

The first thing we should do is acknowledge that it is something that is outside of us, something that is over there, and leave it over there. Exile is never about the Exiled, but the Exiler. The problem isn’t you, it’s the Clique, and the nature of a Clique is that it sucks the life blood out of the group and poisons it from the inside. So embrace your exile from this unhealthy group, they have done you a favour by excluding you. For the more people who walk away from the Clique, means there is a small group out there who are your people, and your exile is your opportunity to find them. So turn it around on them, they didn’t exclude you, you excluded them, they are not your people, your people are still waiting to be found.
Entrelac Knitting

Today I wanted to share with you my latest learned knitting skill Entrelac and boy do I love it. At the time of making this post it is high summer here, and outdoor living is commanded by oppressive heat and chocking humidity, so air-conditioning and knitting are on full blast right now. But as is common with makers such as myself, not one of the wips I have going at the moment is holding my fancy, and I’m craving that new skilled up feeling of trying something I’ve never done before. So to a languishing Craftsy account I searched for anything that would speak to me.

I’m not sure why I’ve avoided Entrelac until now, I seem to find new techniques just when I need them, but that said I am a hungry learner and my skill set is a little bloated with things I may never use. What drew me to Entrelac is the amazing texture it creates in the fabric and a sudden need to know how it is made. And as it turns out, it’s not as mind bending as it looks. But it’s not straight forward either, which is why I’m grateful for Gwen Bortner’s classes, and why I found myself casting on before the end of her second tutorial.

What I Enjoyed About Entrelac: Where most other knitting styles are knit is rows or rounds, Entrelac is knit in units or blocks which you might think of as sort of short rows. This is what I find really fun as it is a total novelty, as is one of the techniques Gwen suggests to use as an accompaniment to Entrelac – knitting in the opposite direction. You can imagine all these little squares of knitting with less than a dozen stitches across and having to turn your work several hundreds of times in a project (no thanks), knitting in the opposite direction means that you don’t have to turn your work, ever (yes, ever). Normally when we (righthanded) knit rows, we knit from our left needle onto our right needle and then turn our work to the wrong side and do a “wrong side row”. But I have started on a new adventure, knitting from my left needle onto my right needle and then instead of turning, knitting from my right needle onto my left needle (truly). It’s a bit fiddley at first to get the action of “purling without purling” but once you get the rhythm, it speeds up the knitting process of Entrelac and withholds the associated pain of the repetitive motion of turning – Thank you Gwen Borter!

What I Found Odd About Entrelac: To make the beautiful texture of Entrelac you need to work these units/blocks on an angle, one row is right leaning, the next row is left leaning, but I twisted my brain a little when I got this confused. I picked up my knitting for a new session and maybe I was a bit tired or just not paying attention, because I had started a new round but had forgotten to change direction! It wasn’t long til I realised my mistake because my fabric did not look right. This was a lesson in always reading my fabric before I start, but with a teensy bit of reverse knitting I was back on track.

What I Found Surprising About Entrelac: To make the first time knitting Entrelac easier, I knitted each row in a contrasting yarn. This made the rows stand out from each other and problems more noticeable to rectify. So each unit is attached to a unit in the row below using a purl two together or a slip slip knit at the end of every second short row. Using this method the fabric is knitted in units, in rows and seamlessly, but ends up looking like it was knit in the round. That last sentence may have hurt your head a little but it’s true, you work the units in rows one unit at a time and when you get to the end of the row, change yarn and then start the new row knitting back in the opposite direction (left learning units in one row then right leaning units back across). So using the joining stitches p2tog and ssk this cowl that I made knit up seamlessly and felt like I was knitting in the round on my circular needles.

So I’ve knit a cowl in pure Entrelac, no ribbing, no shaping. But as I was knitting, my mind was thinking up new ways to incorporate Entrelac into projects as a beautiful feature. Perhaps a cuff of Entrelac on a cardigan, or even used as the patterning in some saddles of the shoulders on a lovely sweater. Maybe something small to start with, an entrelac beanie with a ribbed band that is synched at the crown and a pompon on top? I think what I should really do is the last projects in Gwen Bortner’s Craftsy Class that is a Entrelac Cape, I think I need a Fabulous Cape to show off this winter, and hopefully I have hooked you onto my new knitting diversion. So I suggest you go into you craft room and find a Entrelac pattern in one of the many knitting books you own and go on an Entrelac knitting adventure of your own.

How To Make Dye From Lichen

Have you heard that you can make dyes from used tea bags and coffee grinds? And black beans too, what about purple carrots? The more you look the more things you find that will produce a dye. So I’ve been experimenting dyeing my yarns with botanical dyes of late, and one of my favourites is made from a lichen I found growing in my local area. I’ve been told about lichen by other indie dyers and have googled the crap out of it so trying lichen dyeing has been on my list for quite a while. But first things first, finding the lichen.

Flat leafed Fruticose Lichen growing on the bark of a fir tree.
Frilly Leaf Foliose Lichen growing on tree bark.
Tubular Fruticose Lichen growing on tree bark.

There are many different lichens and not all will produce a dye, so the best types of lichens to collect are either foliose or fruticose types. Foliose lichen are a frilly variety that grow on tree bark, they are usually disk shaped and the frilly edges can be easily pulled away from the bark. It is best practice not to remove the entire specimen, as taking only the edges will allow the lichen to regrow. Fruticose lichens are a beardy looking specimen and will grow on tree bark, rocks and dead wood. They look a bit like coral and can be flat leafed or tubular. The foliose lichens will produce dye colours from pinks to purples, while the fruticose more browns or tans. So get out for a nice walk, take a collecting bag and keep your eyes pealed.

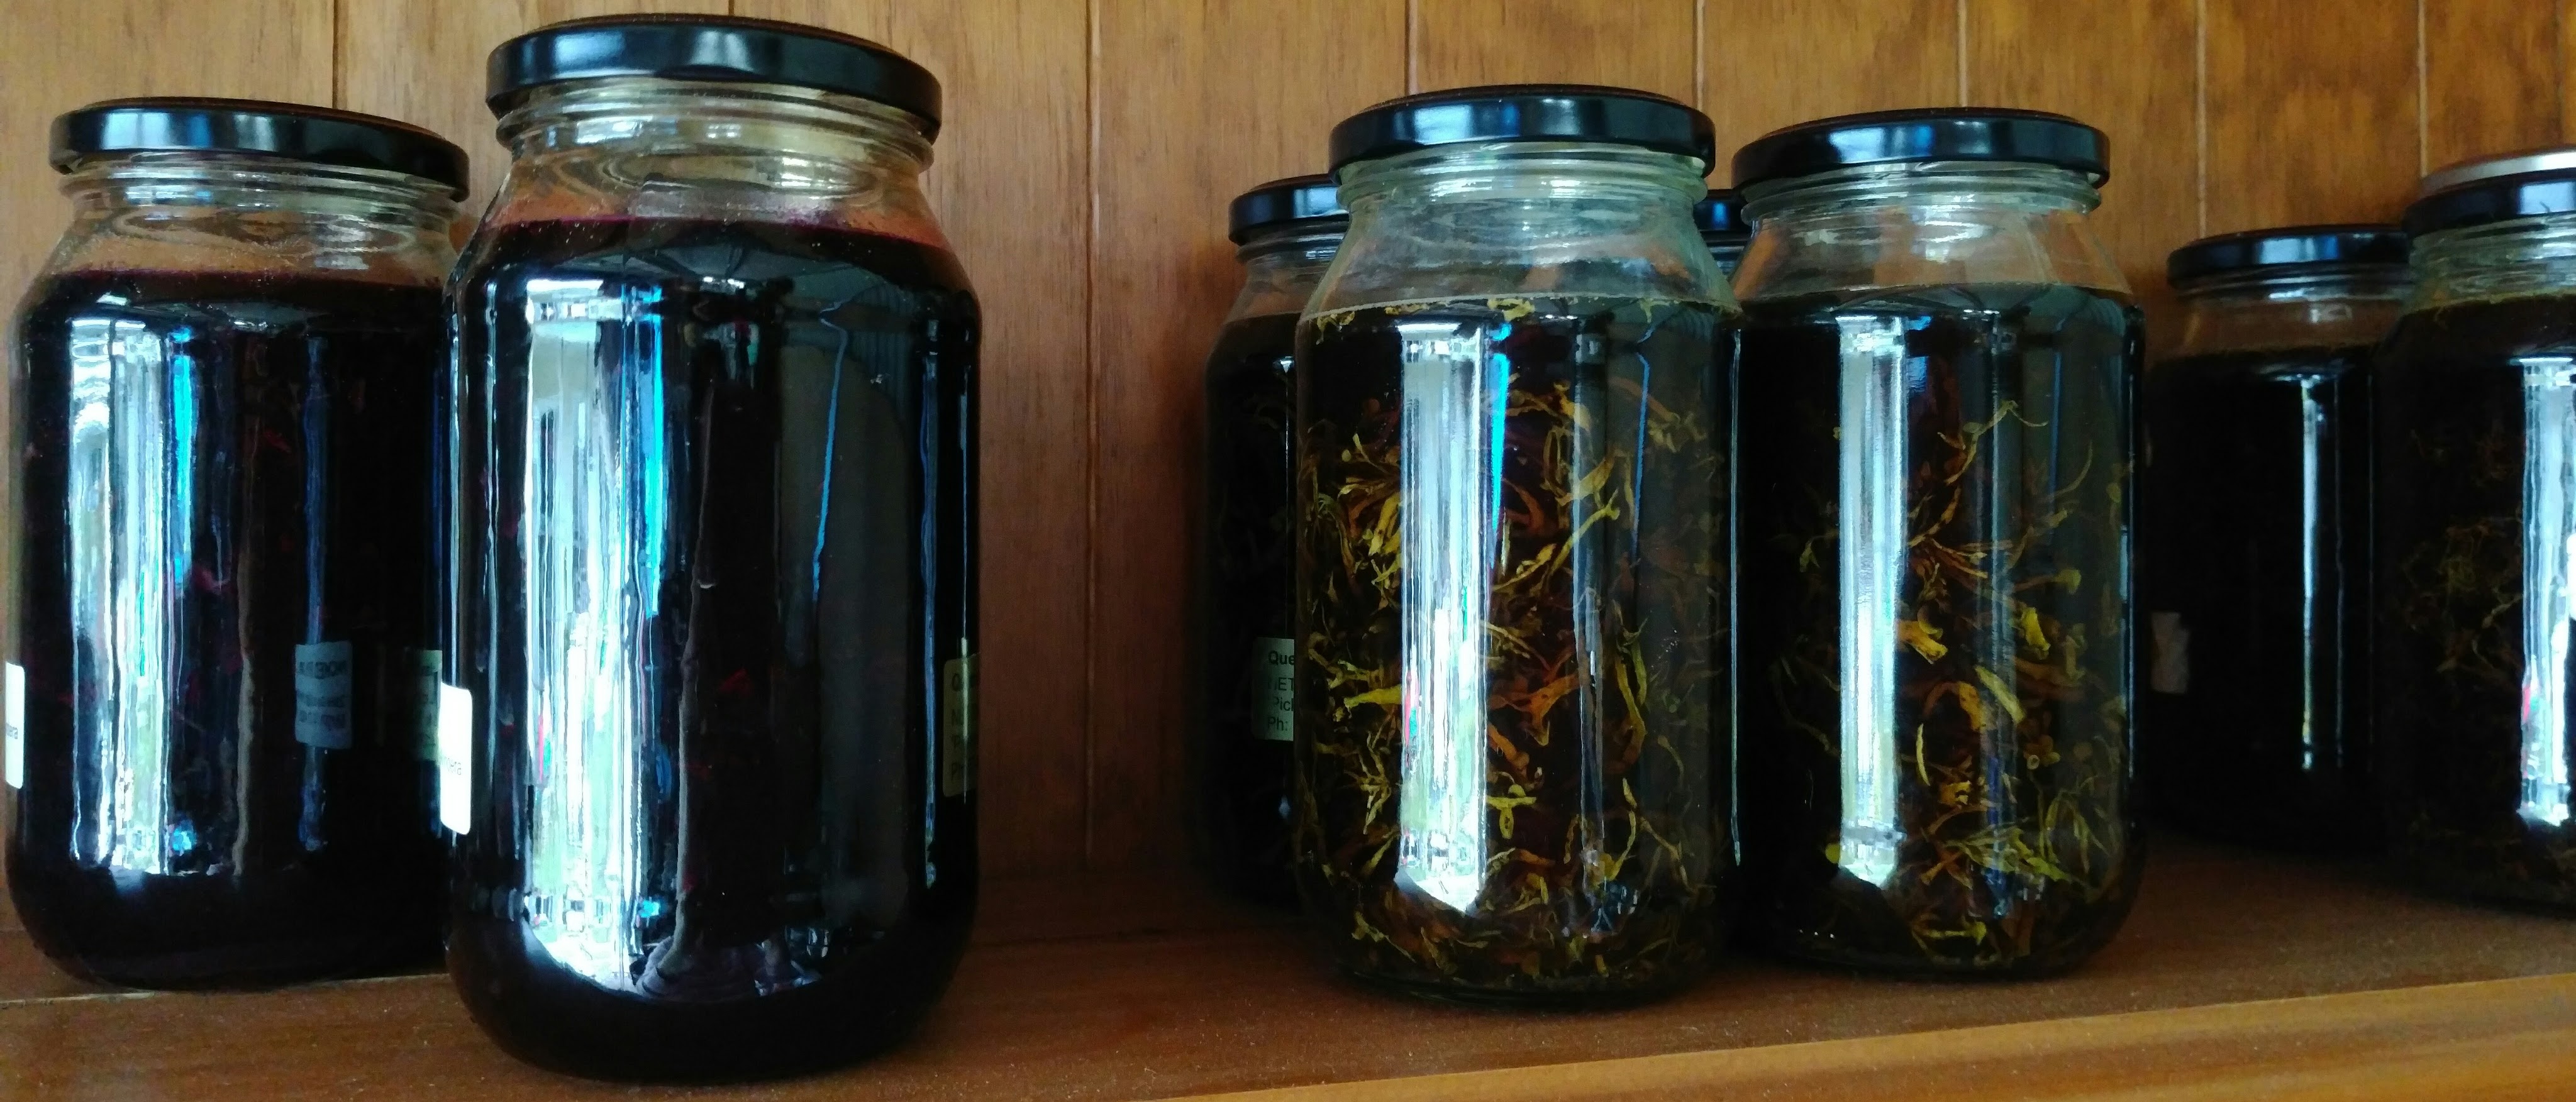
Lichen Dyes curing on a shelf in my studio.

So you’ve collected some lichen, now what? Now you need to make the dye, and separating the lichen by type is a good way to ensure a individual colour. Now go to that cupboard in your kitchen where you are hoarding all your old jars (I know you know which cupboard I mean) because now we need to extract the dye. You will also need some ammonia and some water to make the extracting solution. The solution I use is 70/30 water/ammonia and after you add the lichen to the jar add enough of the solution to cover the contents. Now you need to cure your lichen dye, yep that means leaving it alone for about 2-3 months. A good practice is to label the jar, I would use the word TOXIC as a headline and then the type of lichen you added as well as the start date. While the dye is curing, you want to give it a shake every so often, as well as removing the lid to give it an airing (don’t asphyxiate yourself, a few seconds is enough). So put your dyes in the back of the laundry cupboard and wait for that liquid gold to cure.

Foliose Lichen dye after a month curing.

Finally, a few facts about lichen you might not know. Lichens are a symbiotic partnership between a fungi and an algae, with the fungi as the dominant life form which provides the structure for the lichen, while the algae produces the food source via photosynthesis. Lichens can reproduce asexually, with some types producing spores, while other lichen can reproduce from vegetative dispersal. Some lichens are called mosses, but not all mosses are lichens. If you have lichen growing in your neighbourhood then the chances are you have very low levels of air pollution, so remember when you see lichen growing to take a deep breath and appreciate that lovely clean air.

Solar Dyeing with Botanicals

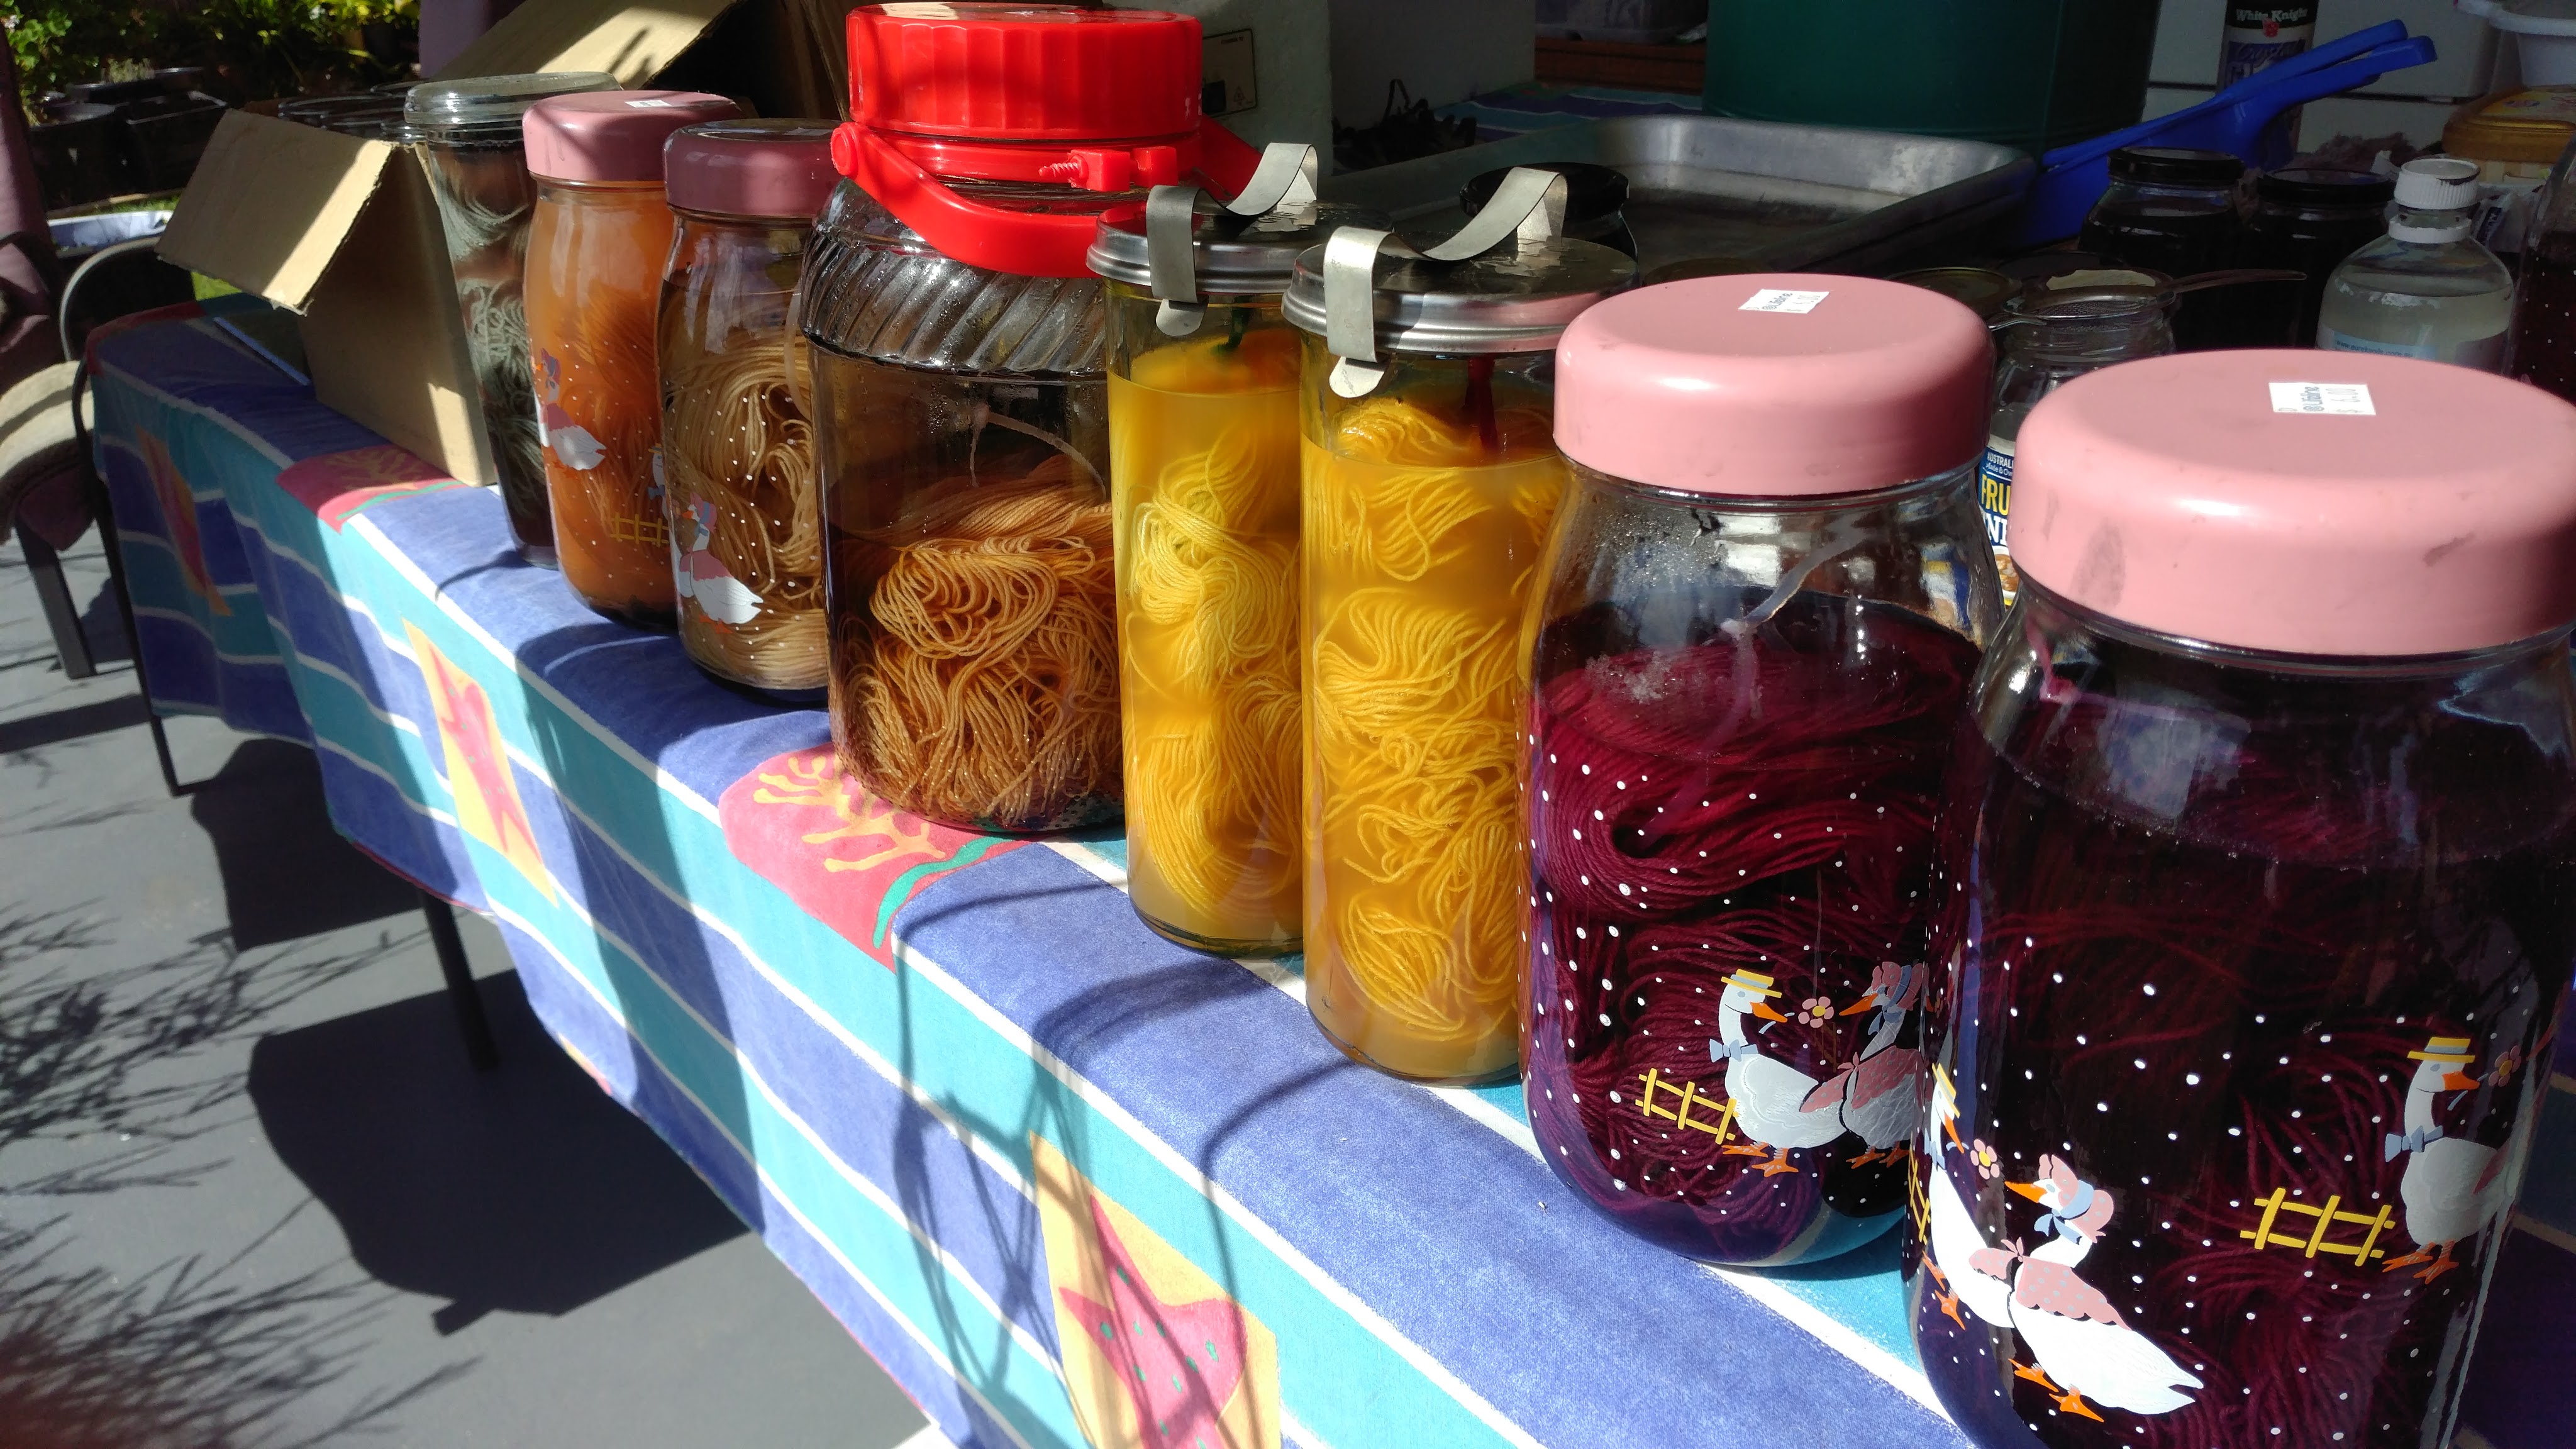
I’m going to have a stall at KnitFest in Maleny this year and I’m so excited to share some of the projects I’m preparing to showcase. This is my solar dyeing space, and I love the colours I’m getting. There are flower dyes, lichens dyes and even tea dyes, and it’s been frustrating waiting to see the finish colours on the yarn. This is just a fraction of what I’ve got planned, so watch this space for another update coming soon…

Knitted Gauge Swatching and why you should

As an avid knitter I am drawn towards the work of other knitters, sometimes for inspiration, other times looking for engagement with my peers, so it was logical choice to become a member of several online knitting groups. These groups are wonderful places to show your work to other members and to ask questions in a safe space that will bring a plethora of recommendations or solutions for problems. These posts are as varied as the people who post them and I myself have gained so much insight from reading them that I have never had to post a question to date. I have noticed however, one question that just keeps popping up, and the answers given mostly don’t adequately address the full gravity of the importance of Gauge Swatching.

One of the issues I believe is contributing to this question of “To Swatch or Not to Swatch” is confusion over what is to be gained by doing it. I have looked at many and varied knitting patterns and all give a gauge, from which needle size to use and the ply of yarn that is best, but ‘What it is for’ and ‘Why it’s important’ is always missing. So let us delve into these questions and fill in the gaping chasm.

Gauge: What is it for? You have a pair of needles and some yarn, gauge is the size of the stitch the that needle and that yarn combination produces. Each individual stitch has a height and a width – it is this high by this wide. Seems pretty straight forward until you need to produce a stitch the SAME height and width as someone else.

Gauge: Why is it important? If you can reproduce a stitch that is the same height and width as the pattern suggests, you will reproduce a product that is the same dimensions as is written in the pattern. This is super important if you are making a garment, something that is intended to be worn. Sure, if you end up knitting a jumper that is a bit bigger you might be happy enough, but you will be sore and bitter if it ends up too small or the sleeve doesn’t fit the armscye. Knitting is a slow, meditative process – it takes time, and a lot of it – to make a one of a kind masterpiece with the cabling and the individually crocheted bobbles and the beautifully detailed neckband that looks like leaves complete with button holes – right? Do you want to get to the end only to find out it doesn’t fit you? That tiny knitted square is starting to look might good by that stage and then you’re left with two choices, give it a new home, or frog that son of a B*&%! You can rehome it and some lucky person will feel like it was meant to be, while you are kicking yourself and starting over again (or giving up completely). Or you can frog the entire project and cry in your wine at all the work being undone (been there and there is never enough wine for that). So the next time you go to cast on a project, save your sanity and knit a swatch.

How to get more by giving more

One of my passions is to learn new skills or refine known ones, but sometimes it’s easy to lose contact with what it is I really want to achieve. We all make things for our own reasons, I want to make pretty stuff just like everyone does, but sometimes we can lose our mojo and finding it can mean doing for another rather than ourselves.

I’ve been knitting for more than 10 years, and I picked it up at a time in my life that was full of difficulties and fears. I didn’t have a plan, I just needed to do, and I made a lot of things that weren’t that great but still gave them away to friends and family. This is not the same as making something with the intention of giving. These things were made for me (my sanity), then gifted. To clarify, I was the primary recipient of what the knitting will produce, I needed the comfort, the mindless meditation and the satisfaction of my toil. The loved ones who received my gifted items were the secondary recipients, and I feel very lucky that these dear people reacted graciously to my gifts.

But doing only for ourselves is not the only or best way to grow as a person, or as an artist. If we only do what is comfortable and what we’ve done before, do we really grow to our fullest self, or grow to be the person we can become in the fullness of our lives. The satisfaction we gain from our toil needs to grow with us or it will inevitably be replaced with dissatisfaction. I could make the same scarf over and over again if I wanted to, right up until I started to hate it and never wanted to knit another scarf ever again, but then I would lose everything I was getting from working on my knitting. So, how do we safeguard against any impending feelings of dissatisfaction?

I hope you spotted it, but we need to make the giving to the recipient our primary reason for doing whatever project we are wanting to do. To clarify, I don’t mean making projects and gifting to charity. I am talking about a more intimate, more targeted and specific project. I’m talking about a way to step out of your comfort zone and give up some of your creative control to the recipient. This is not a project that is instigated by the recipient in a “will you make this for me” moment. If you are a long-time maker, you will know that 50% of these moments will end in tears and on occasion, loss of friendship, no one wants to feel used. We need to keep our sovereignty, while choosing to actively give up some creative controls. Some examples of this would be to say, knit a shawl for your daughter’s wedding day, or take a professional commission from a paying client. The idea it to set reasonable and achievable goals and meet them, while at the same time pushing past a barrier, even a small one, because that’s how we grow.

I want to share with you a growth experience I’m having, because it has helped me appreciate myself and push past a boundary I was unsure of. This time last year I was at home like most people and feeling crushed by the social boundaries of a pandemic. I am a member of a Facebook knitting group and noticed a post looking for people to knit samples for a small Australian business. It really struck me as a possibility, as my knitting skills are advanced but I have only knitted projects I felt comfortable knitting. So I reached out to the poster and filled in an application form. Within a month I had received my first sample, having never done something like this before I was surprised to feel quite excited to get started. In the package I received was the yarn, a pattern, instructions for the assembly, a return post satchel and a deadline. In my application I had conveyed my capabilities and preferences as a knitter and also the tools and hardware I used for projects, so the pattern I received was within my purview. What I couldn’t change was things like the yarn, or the size of the garment, but I had control over things like my cast on method and my preferred sewing up method. It was within my ability but outside my previous boundary, I was getting paid but I had to meet a deadline. With my usual projects, I may have set a deadline, but it was “suggested” and not necessarily met, so I surprised myself that not only could I meet the deadline but also produce the sample that was requested and achieve a very high standard of quality.

I received praise for my work, (and the commission payment) and not long after, a second request to knit another sample. It’s one thing to do it once, but I wanted to be consistent and do it again, not for the money (it isn’t much) but to know the first time wasn’t a fluke, and the next sample was a more challenging pattern than the first. And I found a new boundary with that project, in the first sample I had made a few mistakes, and reverse knitted back to them and fixed them, but with the second sample I made a mistake early and didn’t have time before the deadline to undo so much work to fix it. I learned to accept imperfection, which can be difficult for anyone who takes pride in doing a good job, I had to tell myself that “a mistake isn’t a mistake, but an opportunity to learn”. And what did I learn? That I am not a machine, I make mistakes and I should never be down on myself when my imperfections shine through. I admitted the mistake to the commissioner and that I wasn’t in a position to fix it inside my deadline, and… the world didn’t end, I was praised again for my work and I was offered a third commission. This was a barrier I hadn’t anticipated, but I still benefited from having grown beyond it. What I learned? That my perceived limitations can be exceeded, so that tomorrow, I will be more than I am today.